Yesterday I installed the router lift in the table. I’ve spent today deciding how to build the doors, which actually won’t be doors, but a “facade”. Here’s a quick explanation.
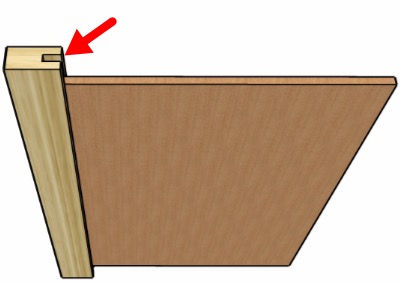
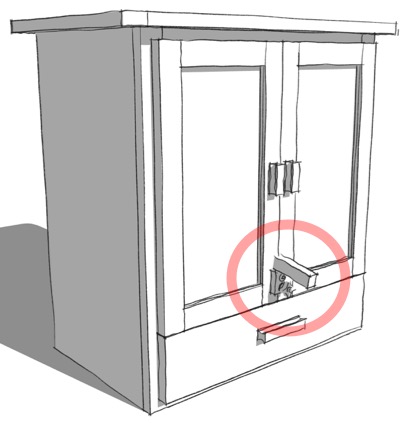 The router lift uses a lever, and the lever needs to stick through a slot on the doors, and the slot also needs to hold the lever clamp.
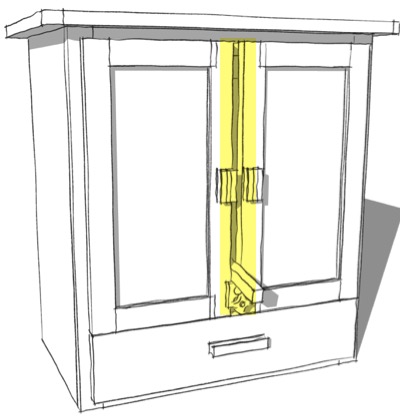 But standard doors won’t work here (they’d just swing open with the weight of the router on the lever).
 (Ignore the door pulls, a.k.a. “knobs”, I don’t know what they’ll look like yet.)
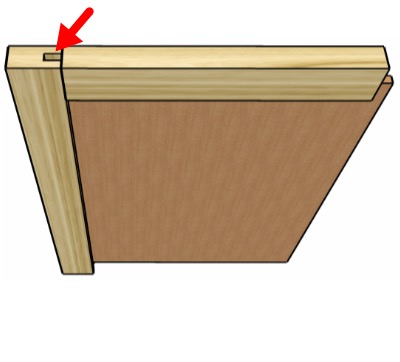
So instead, I’m going to make a facade, which looks like doors…
 …but is actually a single unit held on by magnets.
Joinery and Panel Decisions
Even though I’m not really building doors, for all intents and purposes, the facade will be built like a couple of doors stuck together. So this means I have to decide how I want to build them.
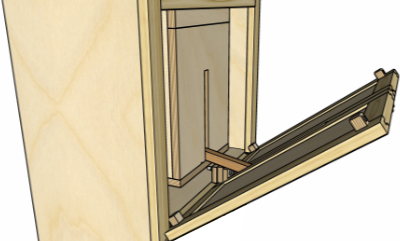
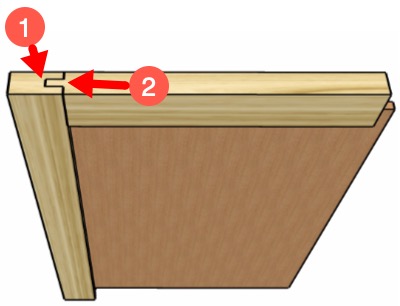
 This is the back of the door frame.
This is the basic design that Steve’s plans call for.
#1 points to pocket screws. They work, but they’re ugly. Of course you only see them when the door is open, or in my case, the panel is removed, but still…
#2 points to where the door panel goes. From the front, it looks like a typical shaker cabinet door. But from the back, you can see the entire panel, and the edges aren’t hidden by the door frame.
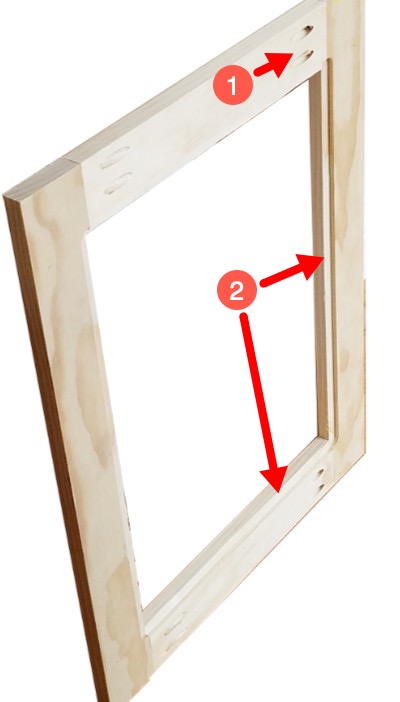
 I’d rather inset the door panel in dados, like this.
 The problem is, as you start adding the rest of the frame, you can see the dado because it goes all the way through the stile (that’s the vertical portion of a door frame).
You might think you could just not cut the dado all the way through, and that is possible, but it’s not easy.
Besides, the rail (that’s the top portion of the frame) and the stile don’t have a very solid joint, since we eliminated the pocket screws.
 The trick is to use a joinery technique called “tongue and groove”.
We already had the “groove” - that’s the dado in the stile (#1).
All we have to do is make the rails with tongues (#2).
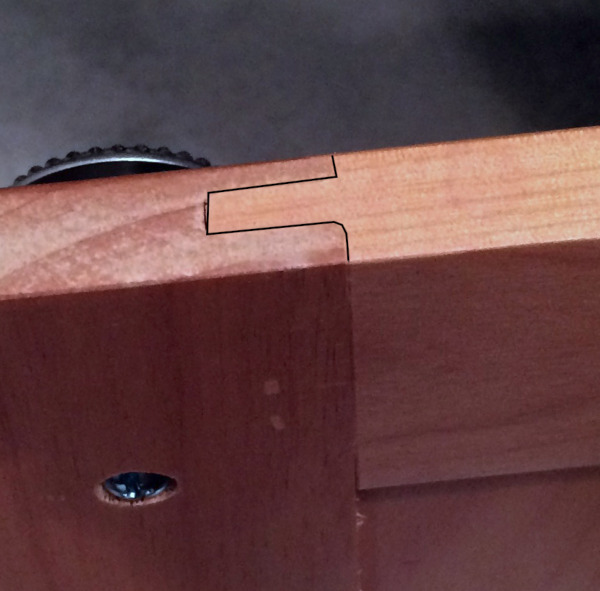 Here’s an example from my bathroom cabinet door. I drew a black line to make it more obvious.
So, that’s my goal for tomorrow.
This is actually easier than you might think, and maybe I’ll go into it in another blog entry. I’ll probably make a video on it, also.
So tomorrow, I’ll be making tongues and grooves. And to my brother Ken, keep your comments to yourself. 😄
Later.
Comments
Now you can comment as a Guest!
You won't receive email notifications of my replies, though.
- Use any name.
- Use test@example.com for your email address.
- “Check” all the boxes. Since you’re using a fake email address, it doesn’t matter what you agree to. 😛
I’ll have to approve your comment, but as long as you’re not spamming me, that’s no problem. Just remember that I do sleep sometimes, or I might be in the workshop, so I might not approve it right away.