I spent yesterday playing around with the Freud Tongue & Groove Router Bit set, making sure I understood how it worked. Today I used it for real, and I have to say, the results were pretty darn good for the first time.
FYI, I’ll be abbreviating “tongue and groove” as T&G.
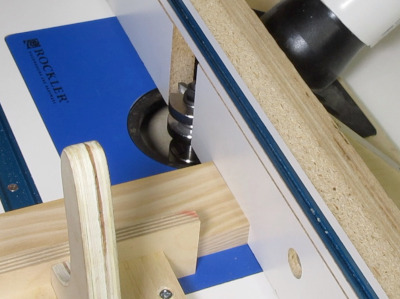
This is the router bit set - follow along with the bouncing balls:
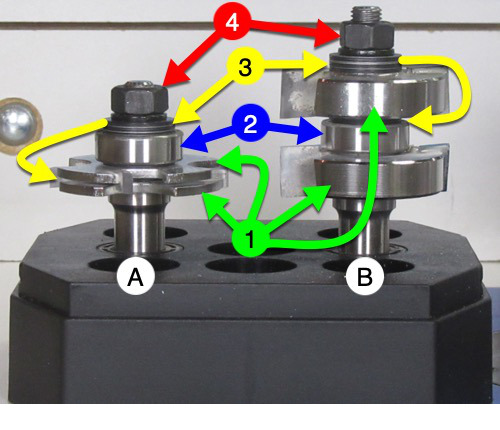 A: Groove-cutting bit.
B: Tongue-cutting bit.
1: Each bit has two blades.
2: Each has a bearing. Above the blades for the groove bit, in between the blades for the tongue bit.
3: Each has a set of shims which are stored on the top; move them to between the blades to change the widths.
4: Remove the nuts to move the shims.
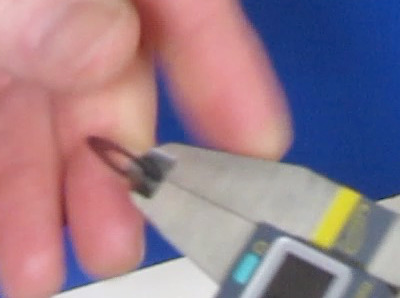
Freud Router Bit Packaging Tip
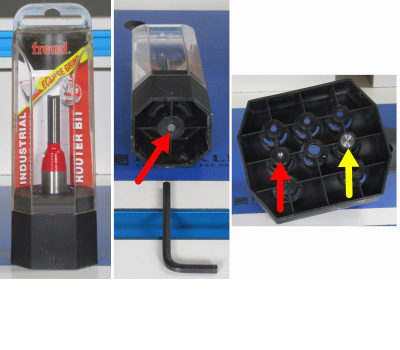
If you’ve ever bought a Freud router bit, you’ve probably struggled to remove the bit without slicing your fingers.
There’s a hole in the bottom (red arrows) that you can stick something in, and push the bit out. I usually use a hex key.
The T&G set has these holes also, but I drilled out the holes so the shanks don’t fit quite so tight. I drilled too far in one of them (yellow arrow).
Finding the base widths
I wanted to know what size tongue and groove the bits cut, without shims. That’ll make it easy to know what shims to add, to achieve a specific dimension.
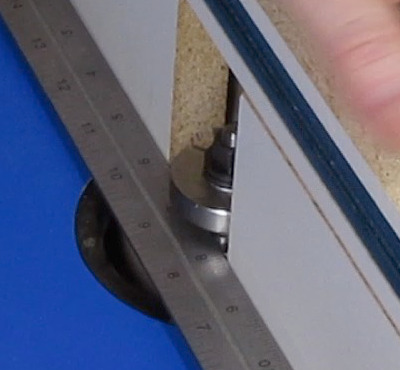
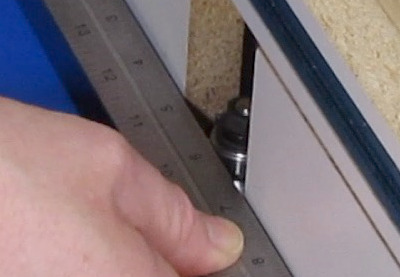 So I aligned the fence with the bearing on the groove-cutting bit (this bit has the bearing above the blades)…
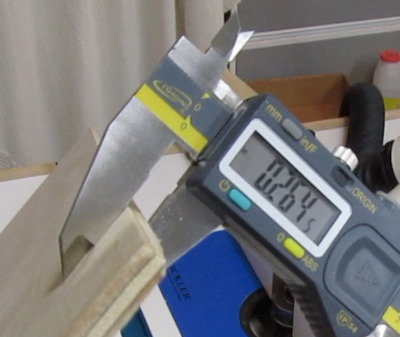
 …then cut and measured the dado.
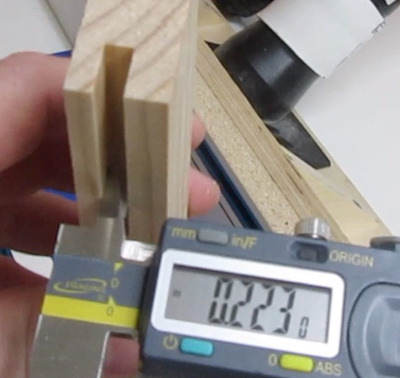
 I did the same with the tongue-cutting bit (this bit has the bearing between the blades)…
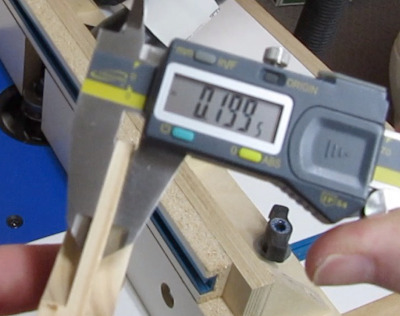 …then cut and measured the tongue.
Setting Up to Cut the Grooves
 I measured the panel that will go in the grooves…
 …did some math…
 …gathered the shims necessary to get the width I needed…
 …made a few test cuts…
 …until I got a Goldilocks fit, and as close to the center of the stock as I could get.
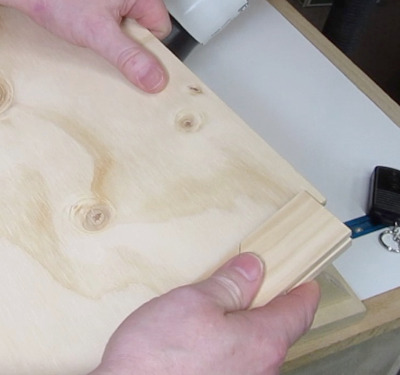
Preparing the Stock Pieces
 I put blue painters tape on one side of each stock piece.
You can’t really get the tongues and grooves perfectly centered, so I’ll make sure I cut every piece with the blue tape facing up. That way, all the cuts will be off-center to the same side.
If I forget and put the taped side down, the piece drags and doesn’t slide very easily, making me stop and pay attention. This actually happened once. Thanks to Colin Knecht for this tip.
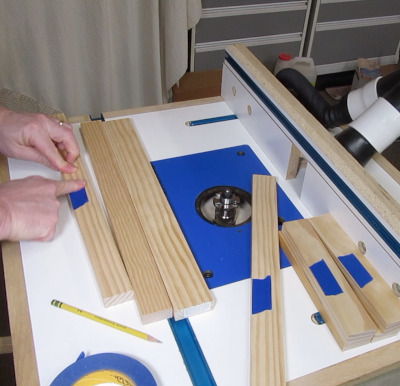
Cutting the Grooves
 I cut the grooves in all the rails and stiles.
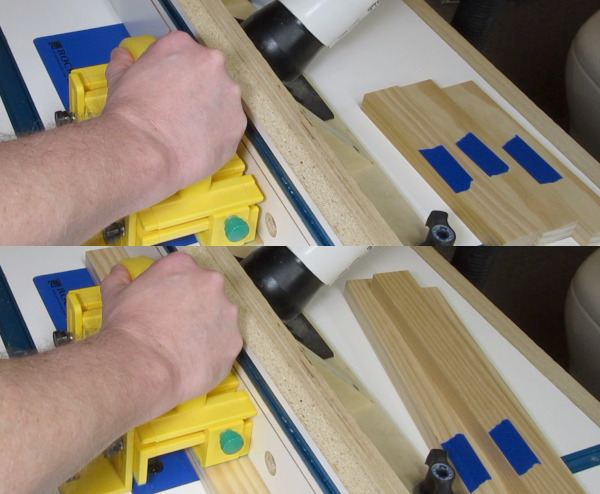
Setting Up and Cutting the Tongues
 I did the same kinds of calculations for the tongues, so I knew how many shims to add…
 …and did some test cuts until I got it right…
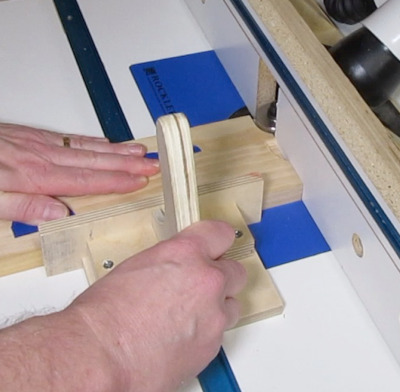 Then I used a DIY miter gauge and a backing board (to prevent tear-out) to cut all the tongues.
Some Assembly Required
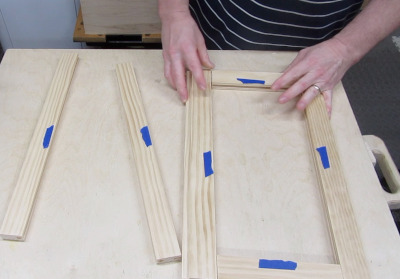 All that was left was to assemble the pieces…
 …including the panels.
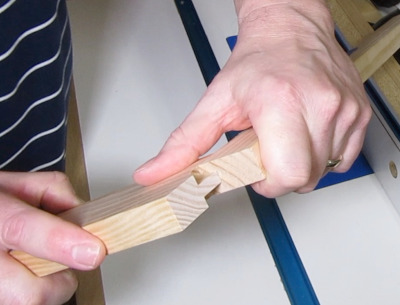
I haven’t glued anything up yet. Here’s the joints, which are pretty darn close to perfect. A little sanding will take them the rest of the way there.

Click on the image to view it full-sized.
Why So Much Detail?
I know I went into more detail here than normal, but I’m planning out my video, and this helped.
Later.
Comments
Now you can comment as a Guest!
You won't receive email notifications of my replies, though.
- Use any name.
- Use test@example.com for your email address.
- “Check” all the boxes. Since you’re using a fake email address, it doesn’t matter what you agree to. 😛
I’ll have to approve your comment, but as long as you’re not spamming me, that’s no problem. Just remember that I do sleep sometimes, or I might be in the workshop, so I might not approve it right away.